
I love making fried chicken chunks because they are crispy on the outside and juicy on the inside, which makes them perfect for a snack or a quick meal. This recipe is simple and fun to make, and it always brings a smile to everyone’s face. I can’t wait for you to try it and enjoy every bite!
Most of the ingredients for this recipe are common in many kitchens, like chicken breast, flour, salt, and pepper. The one ingredient you might want to look for at the supermarket is buttermilk. It’s a little thicker and tangier than regular milk, which helps make the chicken extra tender and flavorful. If you can’t find buttermilk, you can mix regular milk with a little lemon juice or vinegar as a quick substitute.
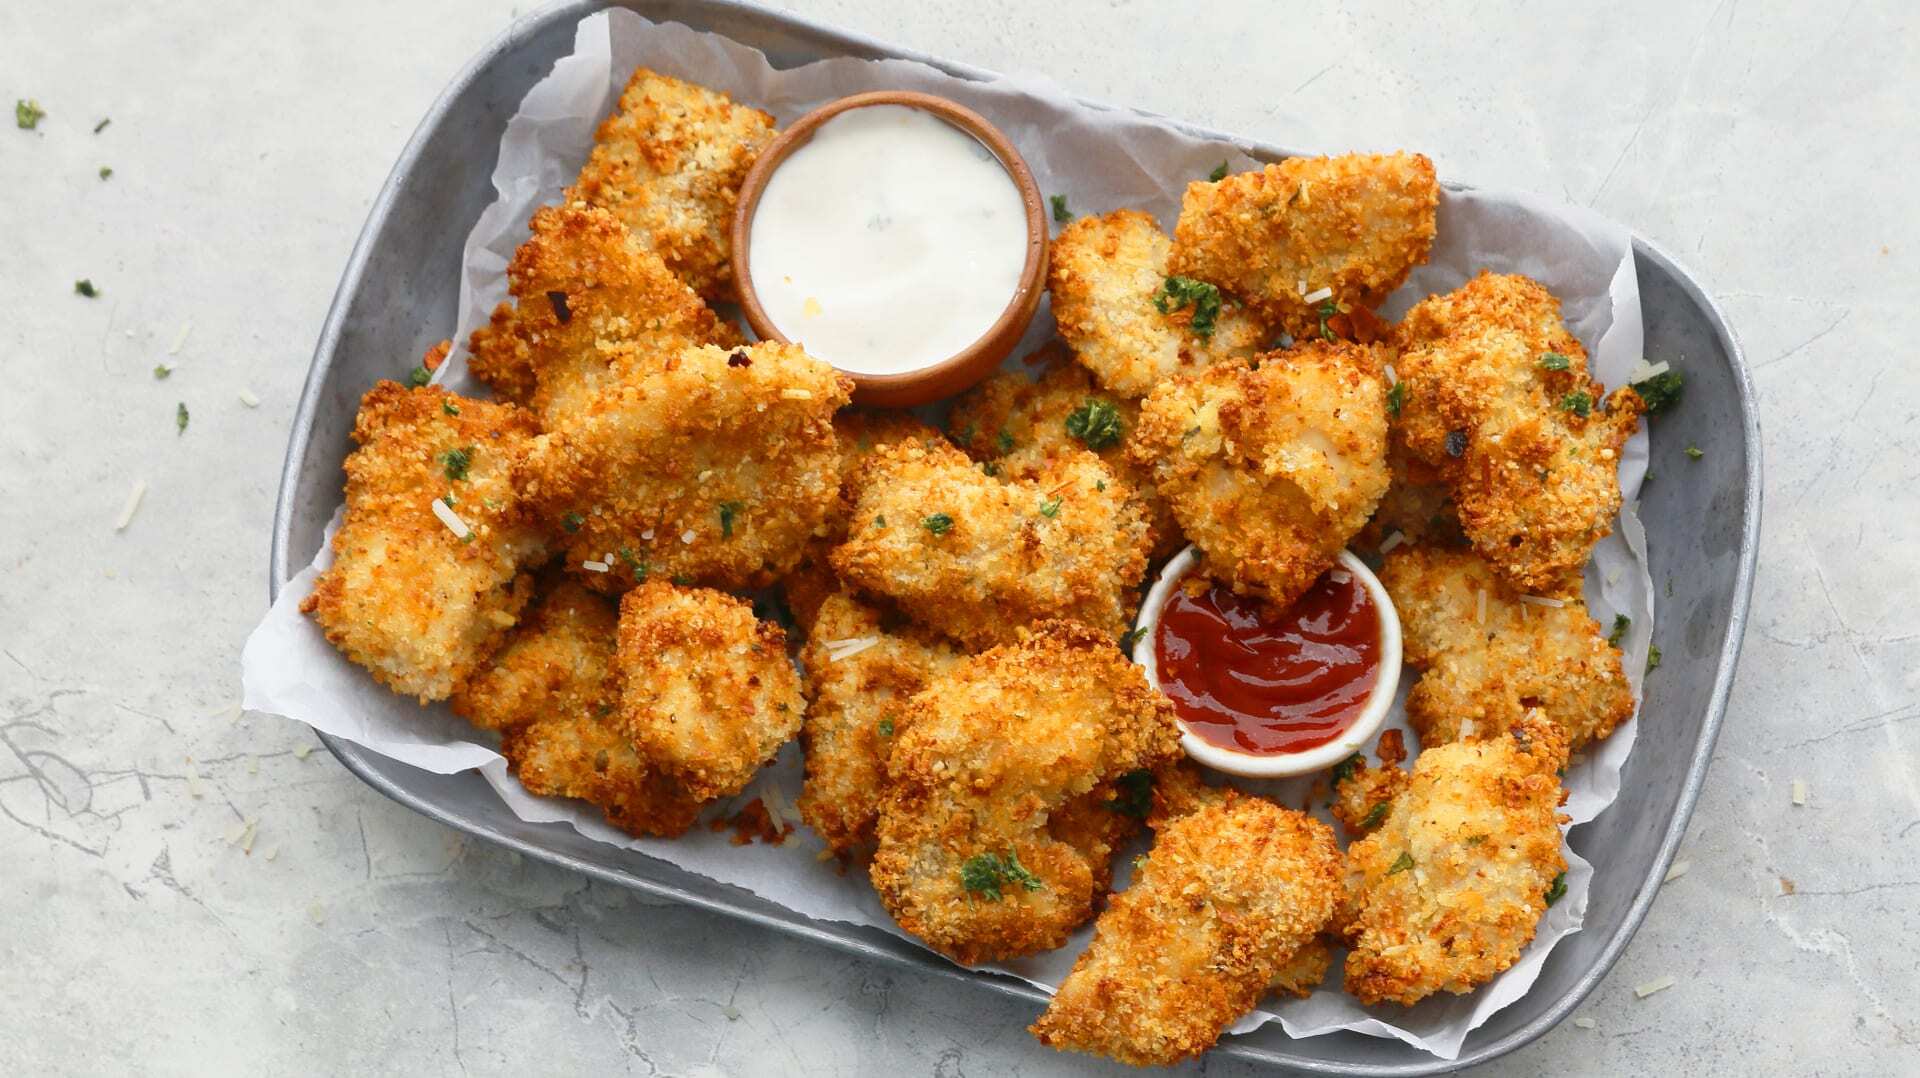
Ingredients For Fried Chicken Chunks Recipe
Chicken breast: This is the main protein, cut into bite-sized chunks for easy frying.
All-purpose flour: Used to coat the chicken and create a crispy crust.
Salt: Adds flavor to the flour mixture.
Black pepper: Gives a little spicy kick to the coating.
Buttermilk: Helps tenderize the chicken and makes the coating stick better.
Vegetable oil: Used for frying the chicken until golden and crispy.
Technique Tip for This Recipe
One of the trickiest parts of making this Fried Chicken Chunks Recipe is getting the chicken pieces coated just right before frying. Here’s a simple way to do it that helps the coating stick well and makes the chicken super crispy and tasty.
First, you want to dip each chicken chunk into the buttermilk completely. Make sure it’s wet all over because the buttermilk acts like glue for the flour mixture. Then, immediately put the wet chicken into the bowl with the flour, salt, and black pepper. Press the flour onto the chicken gently with your fingers so it sticks well. Don’t just shake it around; pressing helps the coating stay put when you fry.
Why does this matter? If the coating isn’t stuck on well, it can fall off in the hot oil, leaving you with bare spots and less crunch. Plus, the buttermilk adds a little tang and moisture that keeps the chicken juicy inside while the outside crisps up nicely.
When I first tried this, I didn’t press the flour on enough, and the coating kept falling off in the pan. It was messy and disappointing! Now, I always make sure to press the flour on firmly but gently. Also, I like to let the coated chicken rest on a plate for a few minutes before frying. This helps the coating set a bit, so it sticks even better.
This simple step makes frying smoother and gives you that perfect golden-brown crunch that makes fried chicken so delicious. Give it a try—you’ll notice the difference right away!
Suggested Side Dishes
Alternative Ingredients
chicken breast - Substitute with turkey breast: Turkey breast has a similar texture and flavor profile, making it a suitable alternative for fried chunks.
chicken breast - Substitute with tofu: For a vegetarian option, firm tofu can mimic the texture of chicken when fried.
all-purpose flour - Substitute with cornstarch: Cornstarch creates a lighter and crispier coating when frying.
all-purpose flour - Substitute with rice flour: Rice flour is gluten-free and provides a similar crispy texture.
salt - Substitute with soy sauce: Soy sauce can add a salty flavor along with a bit of umami.
black pepper - Substitute with white pepper: White pepper has a similar heat level but a slightly different flavor profile.
buttermilk - Substitute with plain yogurt: Plain yogurt can tenderize the chicken similarly to buttermilk.
buttermilk - Substitute with milk and lemon juice: Mixing milk with a bit of lemon juice or vinegar can mimic the acidity and thickness of buttermilk.
vegetable oil - Substitute with canola oil: Canola oil has a high smoke point and neutral flavor, making it ideal for frying.
vegetable oil - Substitute with peanut oil: Peanut oil also has a high smoke point and adds a subtle nutty flavor to the fried chicken.
Alternative Recipes Similar to This Dish
How to Store or Freeze This Dish
Allow the fried chicken chunks to cool completely at room temperature before storing. This helps prevent condensation, which can make the coating soggy.
Place the cooled chicken chunks in an airtight container or a resealable plastic bag. If stacking, separate layers with parchment paper to maintain the crispy texture.
Store the container in the refrigerator for up to 3-4 days. Reheat in an oven at 350°F (175°C) for about 10-15 minutes to restore crispiness.
For longer storage, freeze the chicken chunks. Arrange them in a single layer on a baking sheet and freeze until solid, about 1-2 hours. This prevents them from sticking together.
Transfer the frozen chicken chunks to a freezer-safe bag or container. Label with the date and store for up to 2 months.
When ready to enjoy, reheat the frozen chicken chunks directly from the freezer. Preheat your oven to 375°F (190°C) and bake for 20-25 minutes, or until heated through and crispy.
For a quicker option, use an air fryer. Preheat the air fryer to 375°F (190°C) and cook the frozen chicken chunks for 10-15 minutes, shaking the basket halfway through.
Avoid microwaving the fried chicken chunks as it can make the coating soggy and unevenly heated.
How to Reheat Leftovers
Preheat your oven to 375°F. Place the fried chicken chunks on a baking sheet lined with parchment paper. Bake for about 10-15 minutes, or until they are heated through and crispy.
For a quicker method, use an air fryer. Preheat the air fryer to 350°F. Arrange the chicken chunks in a single layer and cook for 5-7 minutes, shaking the basket halfway through to ensure even heating.
If you prefer using the stovetop, heat a skillet over medium heat and add a small amount of vegetable oil. Place the chicken chunks in the skillet and cook for 3-4 minutes per side, or until they are hot and crispy.
For microwave reheating, place the chicken chunks on a microwave-safe plate. Cover them with a damp paper towel to retain moisture. Heat on high for 1-2 minutes, checking halfway through to avoid overcooking. Note that this method may not retain the original crispiness.
To steam and retain moisture, place the chicken chunks in a steamer basket over boiling water. Cover and steam for about 5 minutes, or until heated through. This method keeps the chicken moist but may not keep it crispy.
Essential Tools for This Recipe
Mixing bowl: A large bowl used to combine the flour, salt, and pepper mixture.
Whisk: A tool to thoroughly mix the flour, salt, and pepper together.
Tongs: Useful for dipping the chicken chunks into the buttermilk and then coating them with the flour mixture.
Frying pan: A pan to heat the oil and fry the chicken chunks.
Thermometer: To ensure the oil reaches the correct frying temperature, around 350°F (175°C).
Paper towels: Used to drain the excess oil from the fried chicken chunks.
Plate: To hold the chicken chunks after they are coated with the flour mixture and before frying.
Slotted spoon: Helpful for removing the fried chicken chunks from the oil while leaving the excess oil behind.
Measuring cups: To measure the flour, buttermilk, and oil accurately.
Measuring spoons: To measure the salt and black pepper precisely.
Time-Saving Tips for This Recipe
Prepare ingredients in advance: Cut the chicken breast into chunks and measure out the flour, salt, and pepper the night before.
Use a deep fryer: A deep fryer can cook chicken chunks more evenly and quickly than a frying pan.
Double coat for extra crunch: Dip the chicken in buttermilk and flour mixture twice for a crispier texture.
Keep oil at the right temperature: Maintain the oil at medium heat to ensure the chicken cooks evenly without burning.
Drain properly: Use a wire rack instead of paper towels to drain excess oil for a crispier finish.
Fried Chicken Chunks Recipe
Ingredients
Main Ingredients
- 1 lb Chicken breast cut into chunks
- 1 cup All-purpose flour
- 1 teaspoon Salt
- 1 teaspoon Black pepper
- 1 cup Buttermilk
- 2 cups Vegetable oil for frying
Instructions
- 1. In a bowl, mix flour, salt, and pepper.
- 2. Dip chicken chunks in buttermilk, then coat with flour mixture.
- 3. Heat oil in a frying pan over medium heat.
- 4. Fry chicken chunks until golden brown and cooked through, about 5-7 minutes per side.
- 5. Drain on paper towels and serve hot.
Nutritional Value
Keywords
Suggested Appetizers and Desserts
More Amazing Recipes to Try 🙂
- Ciabatta Grinder Salad Sandwich Recipe15 Minutes
- Sweet Potato Rolls Recipe55 Minutes
- Smoked Corn on the Cob Recipe40 Minutes
- Banana Pancakes Recipe30 Minutes
- Beef Noodle Soup Recipe2 Minutes
- Whole Wheat Banana Nut Bread Recipe1 Hours 15 Minutes
- Finnish Long Drink Recipe5 Minutes
- Avocado Ranch Salad Dressing Recipe10 Minutes
Leave a Reply